Been There? Help

Been There? is an app that helps you explore new areas by keeping track of your explorations while allowing you to annotate your paths with notes and images. So what makes it different from other path tracking apps? Three reasons. First, you can view all your paths on one map. This makes it really easy to see what areas you may have missed as you explore. Second, it is easy to add annotations to your route, either text or images. Finally, you can group your saved paths many different criteria such as area, activity, date, duration, distance, etc.
Want to share a particular interesting path? You can export it as GPX for a GPS, KML for Google maps, or a Been There? format for loading in another Been There? app.
So how would you use Been There? in the real world? Where I live there are lots of stairways that join neighborhoods in the hills. It is my goal to walk every stairway in the city. What better way to do that than to track each walk then to display every path on a map to see what I’ve missed?
Application overview
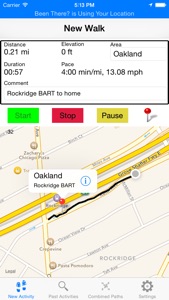
The New Activity tab is where you create a new activity and track your path. You can specify the activity type, the area, and add a comment. Once tracking has started you can add annotations to the map.

You can change the activity type by clicking on the title then choosing the desired activity from the list.
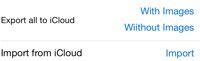
These settings allow import and export of activities to a file on an iCloud drive. The file format includes all path and annotation data, including images.
In this area, you can change the area and add a comment. When you click on the area box, you have the choice of defining a new area or choosing an existing one.

These buttons control the recording of the new activity. Pressing start activates tracking. “Pause” continues the activity but stops tracking until you press “Start” again. This is useful if you need to use your phones location services in another app temporarily. The “Stop” button ends the activity and asks whether you want to save the data or not.

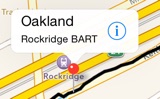
The “Pin” button adds a map annotation at the current location. You can edit the title and notes, add an image, and change the pin color by clicking on the circled “i” on the right side of the bubble that appears near the annotation.
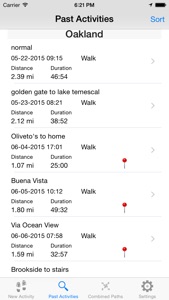
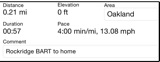
The Past Activities tab displays all the activities you have tracked. They grouping (by area, activity, or ungrouped) can be specified in the Settings tab. The list can be sorted by clicking on the “Sort” button in the upper right. Swipe left to delete an activity. Swipe left on an area heading to delete an area and all its activities. A walk can be viewed by clicking on the “>” button to the right of its entry. This will bring up a display of the data for that walk and its path:
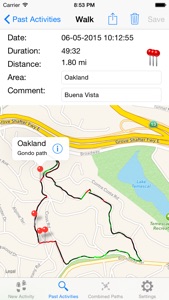
The screen that displays a saved activity also allows you to edit its data and view its annotations. To change the activity type, click on the title. You can then choose a new activity from the list. Both the area and comment can also be changed. Annotations can be viewed by clicking on their pin. You can export in various formats by clicking the action icon in the top toolbar.

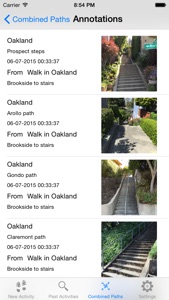
The “Pins” button brings up a screen which displays a list of all the annotations on the map. Images on the list can be expanded to full screen by clicking on them.
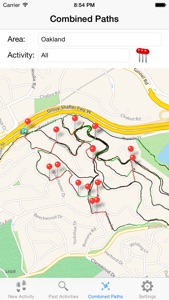
The Combined Paths tab displays a collection of superimposed paths. The paths to display can be selected by area, activity, or both. Annotations can be viewed by click on an individual pin. You can also view a list of all the annotations in all the paths by using the “Pins” button.
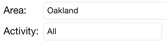
Use Area text box to select the area whose paths are to be displayed. Use the Activity box to select the activity.

The “Pins” button brings up a screen which displays a list of all the annotations on the map. Images on the list can be expanded to full screen by clicking on them.
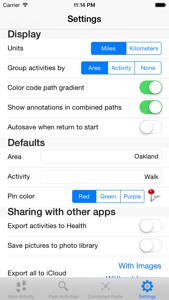
The Settings tab allows you to specify how the program behaves.

The Units setting controls whether English or Metric units are used for distance.

The Group activities by settings controls how activities are grouped in the Past Activities tab.

This setting controls whether annotations are displayed on Combined Paths tab.

If Autosave is on, the walk will automatically be saved when you return to the location at which you started.

These settings allow the default values to be set.

If this settings is on, when an activity is finished, it will also be exported to the iPhone Health app as a Workout.

If this settings is on, when a picture is taken with the camera to be added to an annotation, it is also saved to the iPhoto library.